آموزش نصب سریع vRealize Automation 7
Category : دستهبندی نشده
آموزش نصب سریع vRealize Automation 7
It’s been some time that vRealize Automation 7 has been released and I reported about that in my post, but still haven’t had the chance to test it in the lab. That’s why today’s post. vRealize Automation 7 Simple Install is for today. Know that another type of installation is Enterprise install which is destined for medium to large scale deployments.
The new architecture of vRA 7 allows scalability and at the same time there is fewer services to deploy and fewer VA’s to manage with fewer external dependencies. However we used separae SQL server to deploy the VRA database.
The installation is less “exhausting” with less “gotchas” found in the previous release, however many new features introduced makes perhaps some additional difficulties when it comes to upgrading from previous release. Good for the new users allowing them to deploy and test the solution more easily, but existing vRA users might scratch their heads around the upgrade workarounds….
All services are automatically clustered when deployed in Enterprise configuration.Thedocumentation of vRA can be found here which will get you the HTML and PDF and e-Book documentations as well. I think that this post will be a bit long but nothing better than having a screenshot… I always say “picture is worth a thousands words”…
Let’s get started, because this post will be a little bit longer than usual….
vRealize Automation 7 Simple install
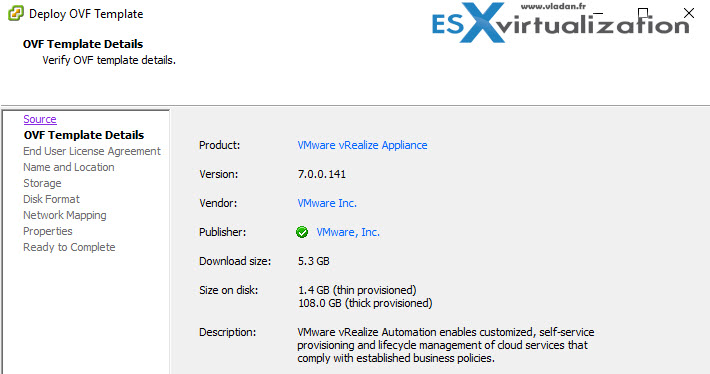
The first thing you need to do is to download the 5Gb OVA file! Then start the deployment by validating the OVF file through vSphere client. I particulary chose the “old” vsphere client over the web client to see if there were any issues with the deployment – nope.
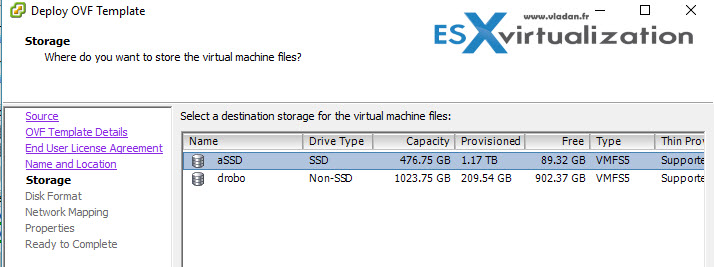
Then, nothing fancy you choose where to deploy, which host, datastore…. traditional and standard deployment so far…
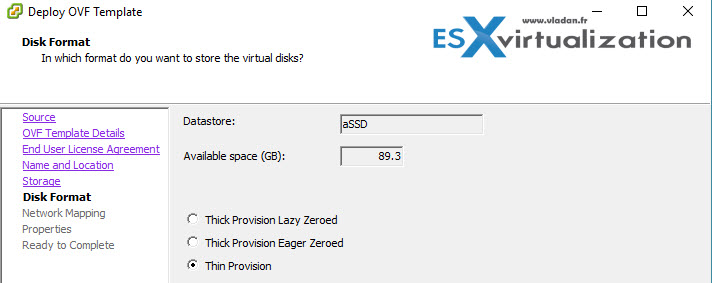
The next step the disks…
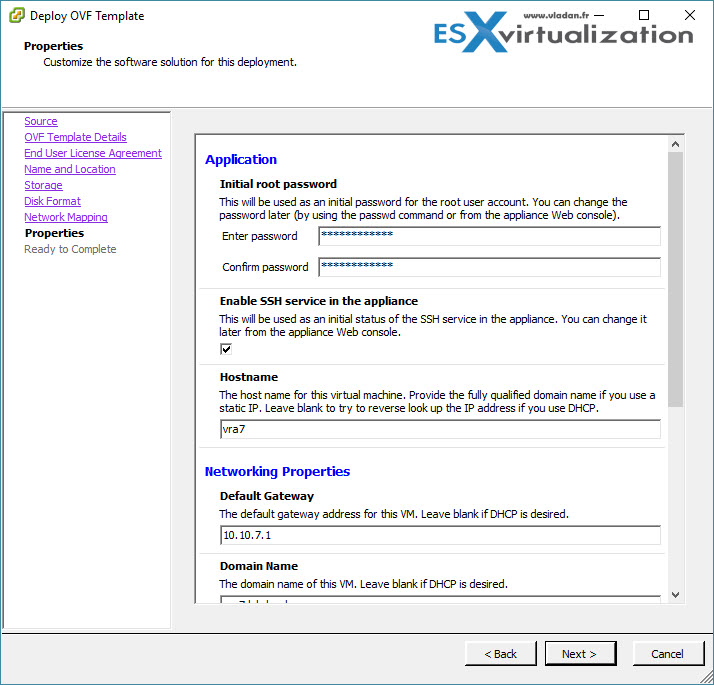
The next step we need to enter:
- The initial root passsword
- If we want SSH access
- The Hostname
- Default Gateway
- DNS name
- IP details…..
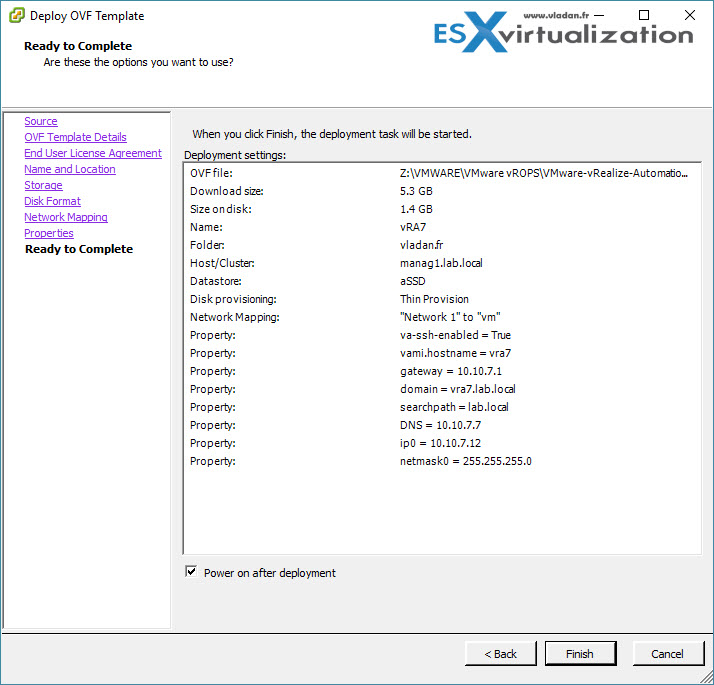
So far so good… this is the recapitulation of all the details that were gathered and the deployment will start. We checked the Power On after deployment check box as well so we don’t have to push the Power On button manually… Let’s have a cup of coffee while the appliance is deploying…
Or you can watch the progress bar… -:)

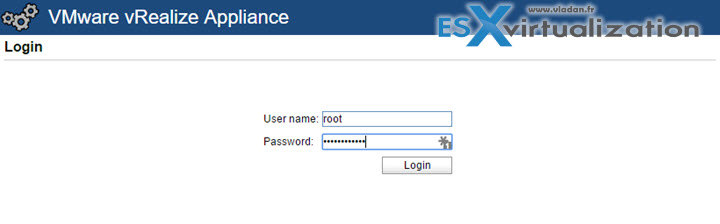
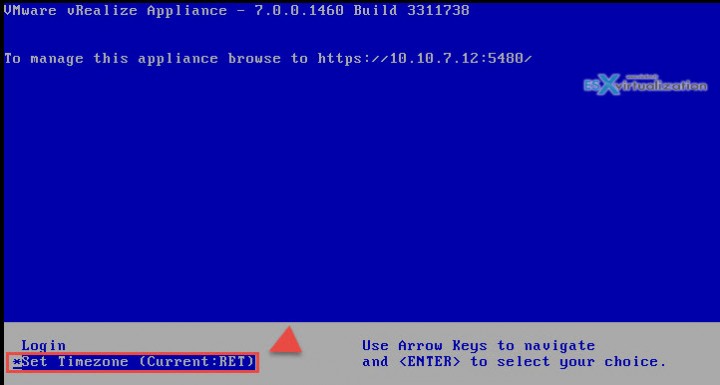
After deployment we need to log in through the VAMI interface so in our case we will go tohttps://10.10.7.12:5480
After login it imediately brings up a browser overlay pop-up window (the same one we can see on some web sites). It’s not a normal pop-up browser widnow, just a layered pop-up window within the same browser window… I just wanted to precise that. You can click to enlarge…
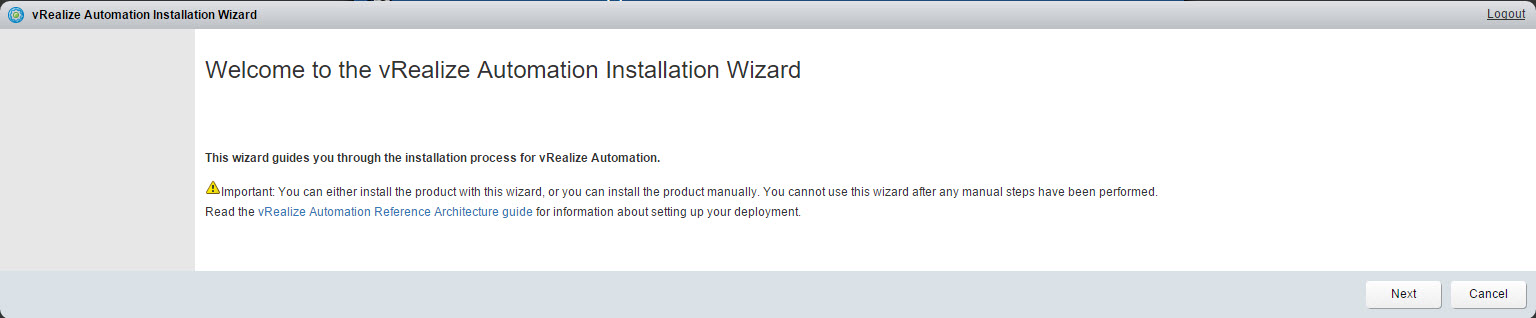
Basically it says that two deployment options are provided:
- automatic – via assistant
- manual – …. ehh manually. Note that if you start any of the manual steps you must continue until you finish via the manual way.
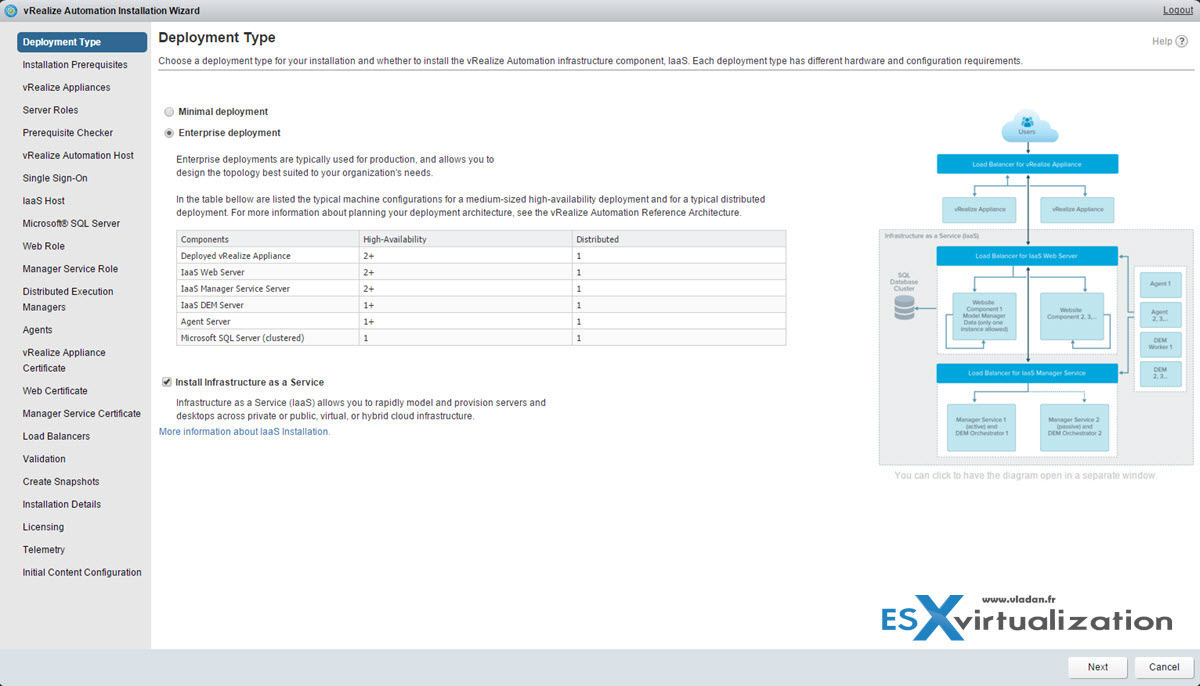
Bellow you can see we chose the Minimal deployment…

Note that when you change the check box to “Enterprise deployment” the number of steps on the left change and also the image on the right changes…
Here is the view for that, but as for this post we’ll go back and stick with minimal deployment.
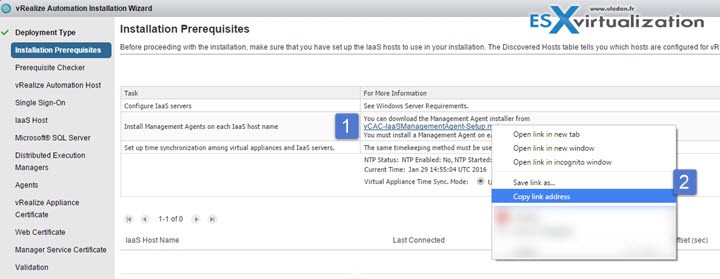
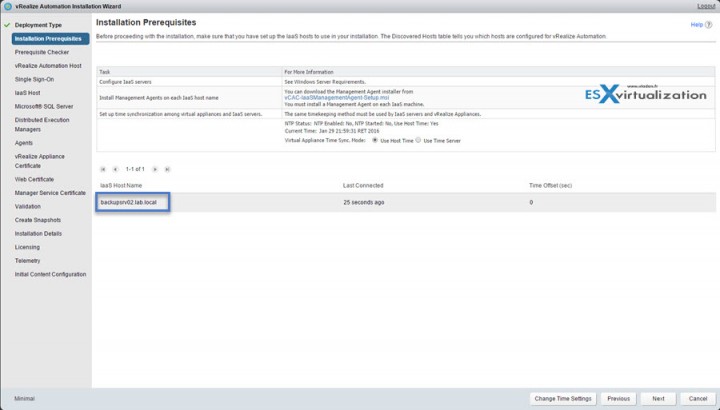
On the next screen we have link to an msi file which we need to copy… It’s a link to the Management Agent Installer. You have to install Management agent on each IaaS machine.
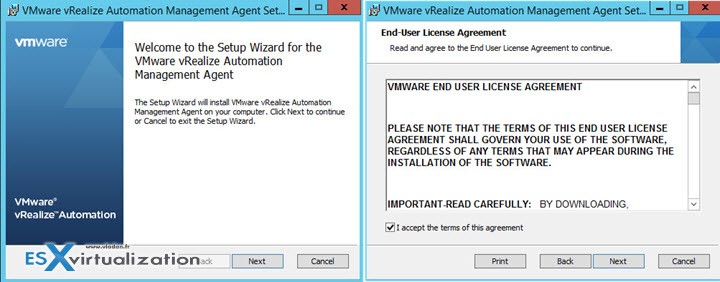
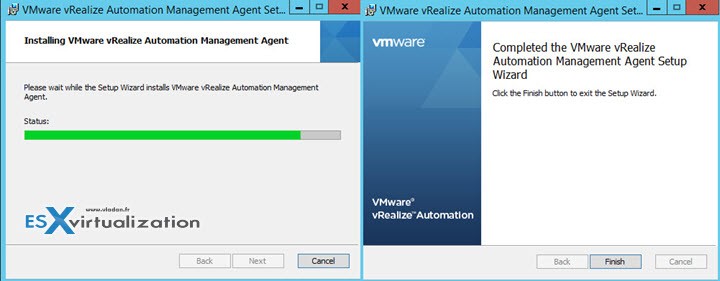
Then go to your Windows system and start the installer, accept the license agreement and click next.
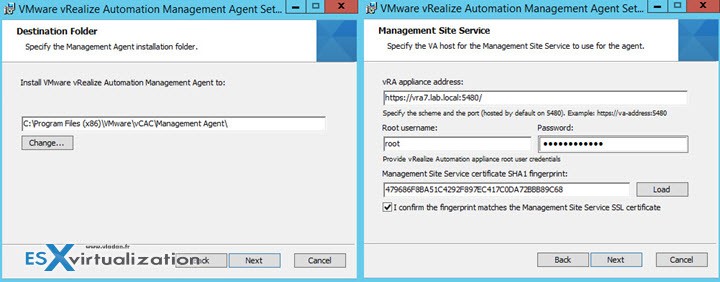
Check the default install path > Fill in the different information requested, like path to the VRA appliance. (https://vra7.lab.local:5480 in our case)
There is also a checkbox where you validate the fingerprint pulled from the appliance. If in any case you need to reinstall VRA, you also have to reinstall the management agent as the fingerprint will be different.
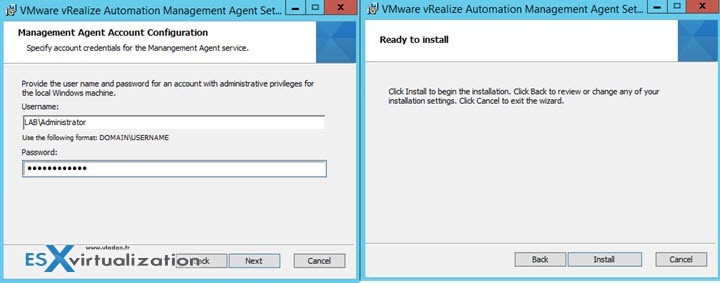
We’re in the lab environment, I’m using domain admin account. Best practices certainly let you create a dedicated account…
Make sure that your appliance has the correct time setup. In my situation I had to adjust the timezone through the appliance console…. If you don’t have the correct time setup, the assistant throws you an error and you can’t go further!
Now let’s go back to our assistant that we have started previously…. You should see a new line there – it’s the server you have just installed the agent.
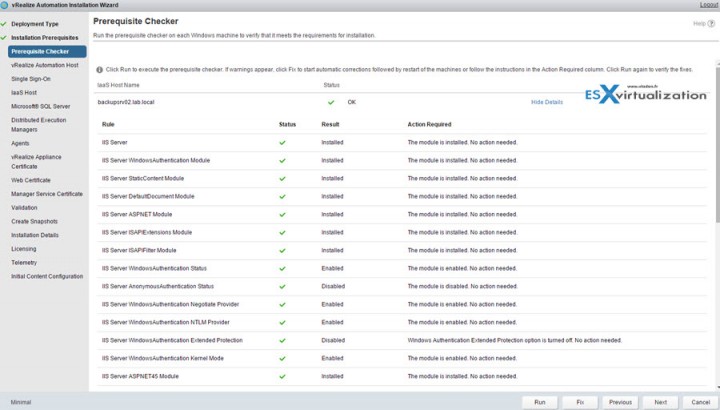
The next step will do a prerequisites check on the server where you installed the agent…
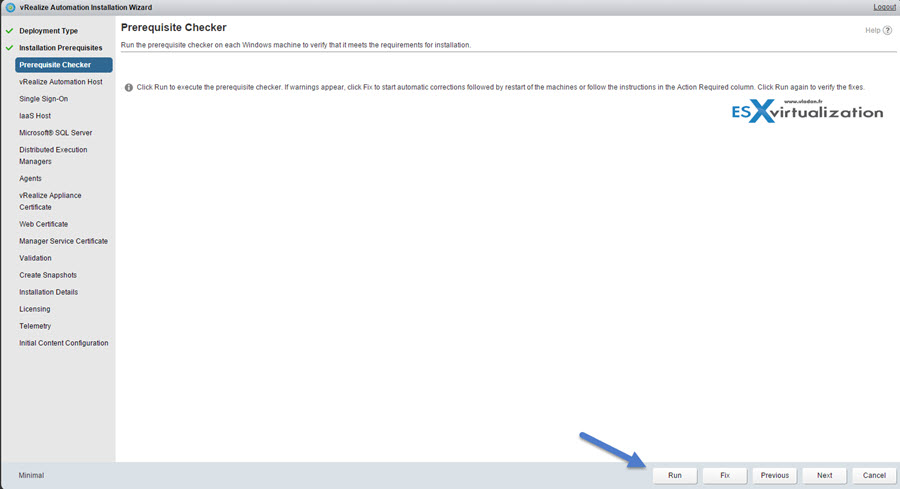
So far so good… I think that there are some requirements that were not met….

You can click the Fix button and the server shall automatically install the required components. It’s possible that it does not as Windows Server might need the correct path to the ISO…. still even in 2012R2…
A manual way is sometimes necessary to satisfy all requirements. For example, the systemneeds also Java and environment variable path in Advanced System Properties >Environment variables button:
variable name: JAVA_HOME
variable value: C:\Progra~1\Java\jre1.8.0_71
I had to go through the manual steps (perhaps also because sometimes the source ISO of Windows 2012R2 isn’t in the good path when add/remove roles/features is invoked)….
in my case is now All Green …
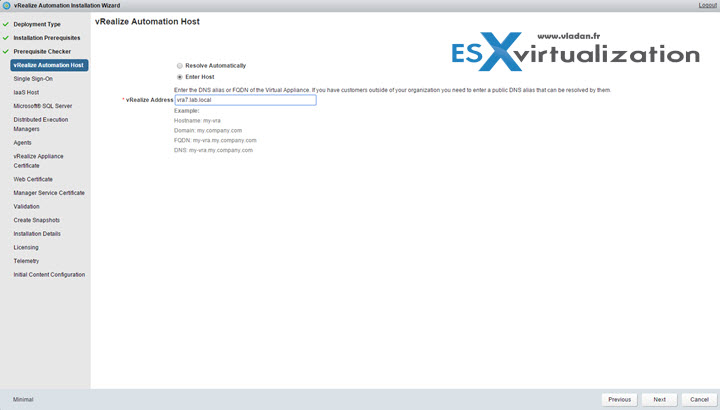
Then enter the DNS name.. but you should be also be able to leave it on “resolve automatically”….
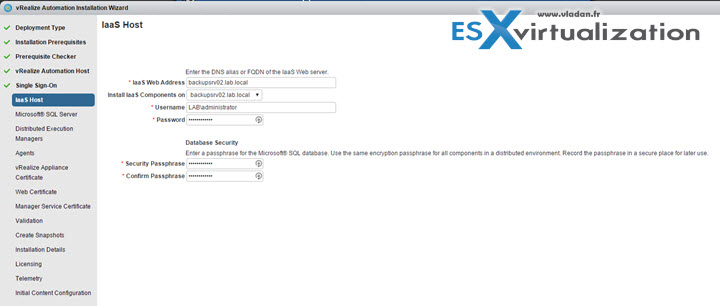
The next step shall enter a password for the default tenant account…

Then
Then SQL.
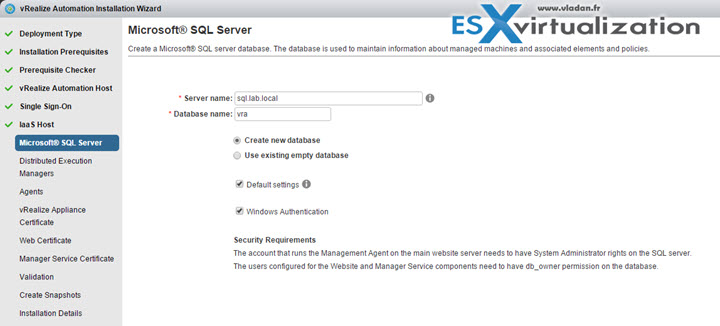
I actually used the existing empty database option finally as I created manually the vra database on my SQL server….. via SQL server management studio.
Next step I had to do was to Enable Snapshot Isolation:
ALTER DATABASE MyDatabase
SET ALLOW_SNAPSHOT_ISOLATION ON

ALTER DATABASE MyDatabase
SET READ_COMMITTED_SNAPSHOT ON
then
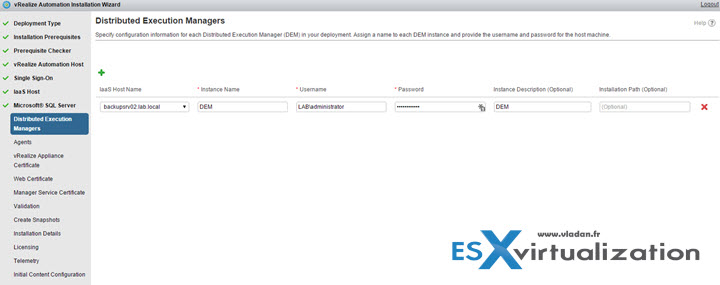
then
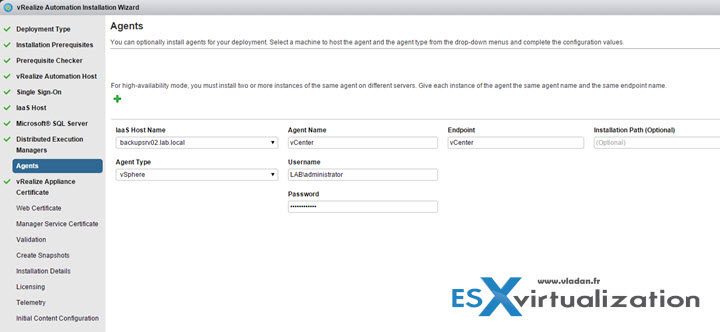
then
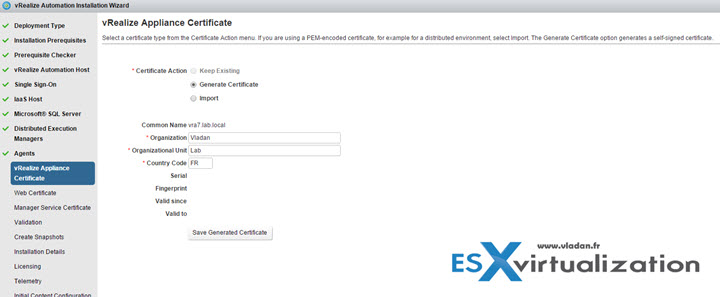
then
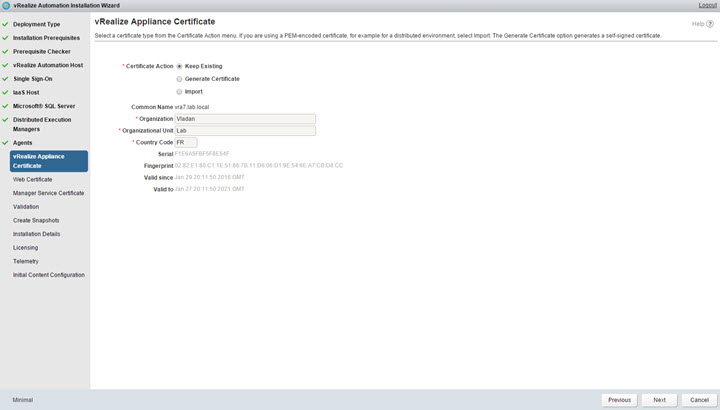
then the same for web certificate…
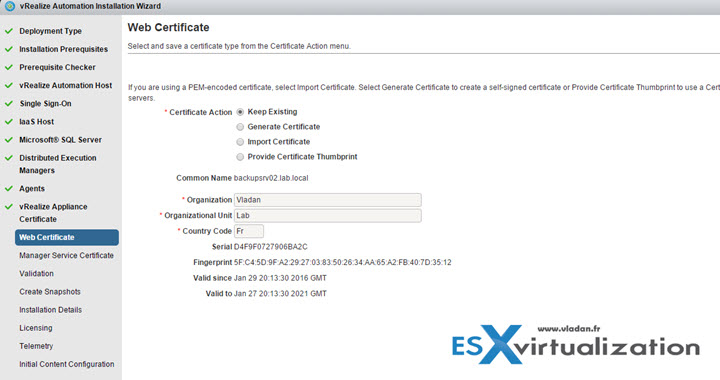
next,
and the same for Manager Service Certificate. Same screenshot, same stuff…. (skipped the screenshot for those)
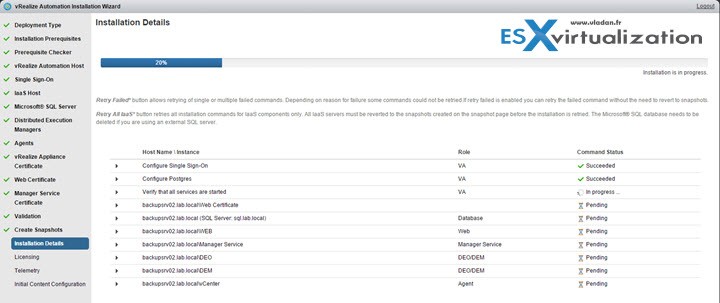
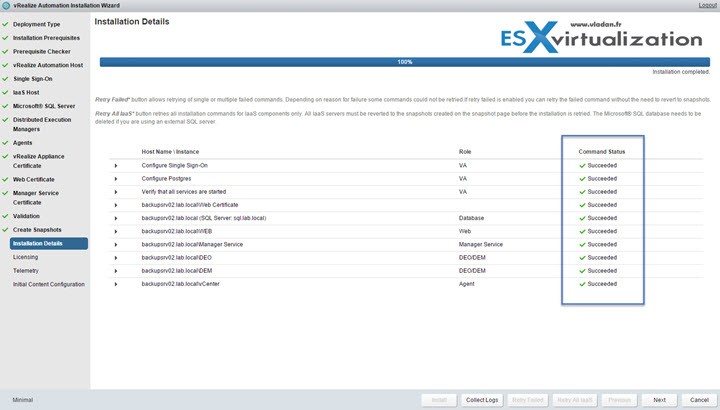
Validation….. click the validation button ! It can take something between 10 min and half an hour !!!
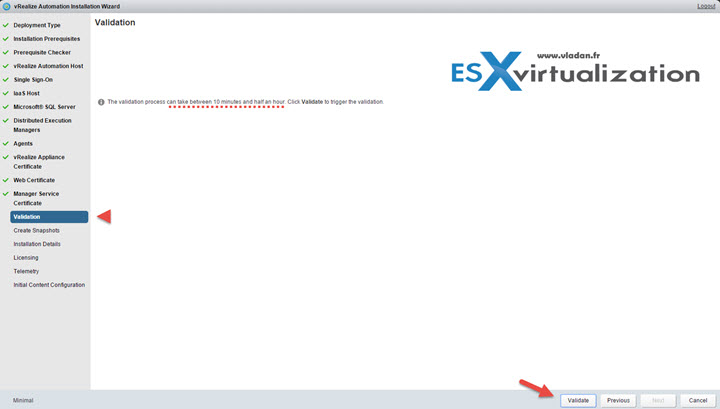
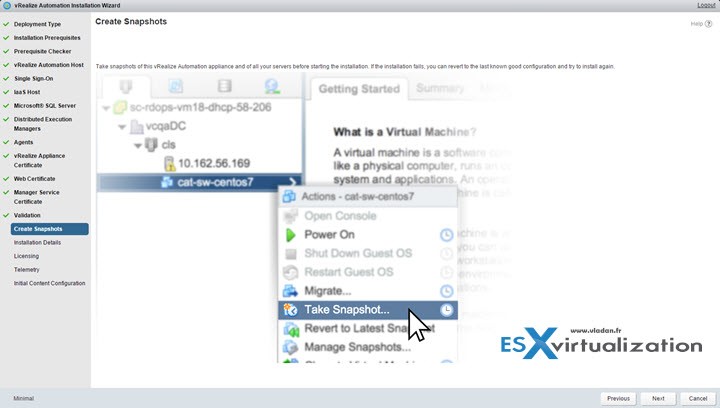
Once done you’re invited by VMware to do a snapshot of the VM !!!
On the next screen we can see the notice about the installation with a message that “The installation process can take between 30 minutes and two hours”… And that you can re-try the installation of failed components (multiple or single) – with a button there. (now grayed out).
With Retry All IaaS will retry only the installation commands for IaaS components only. All IaaS servers must be reverted to the snapshots created on the snapshot page before the installation is retried. The Microsoft® SQL database needs to be deleted if you are using an external SQL server.
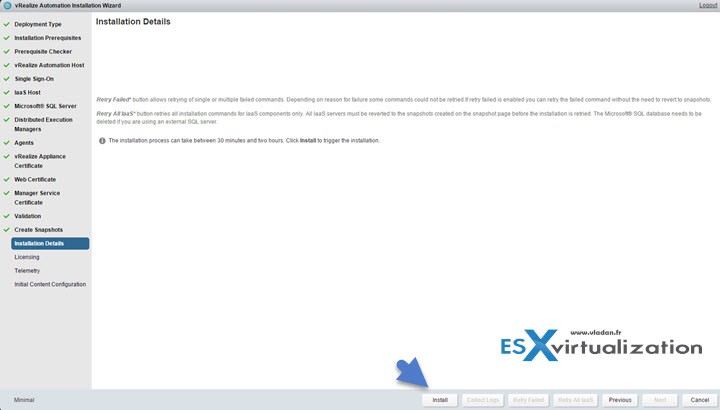
Let’s hit that Install button now and see… -:)
We have a progress bar which is growing, and more and more of those green check-boxes. Crossing fingers .. -:)
And ….. done!
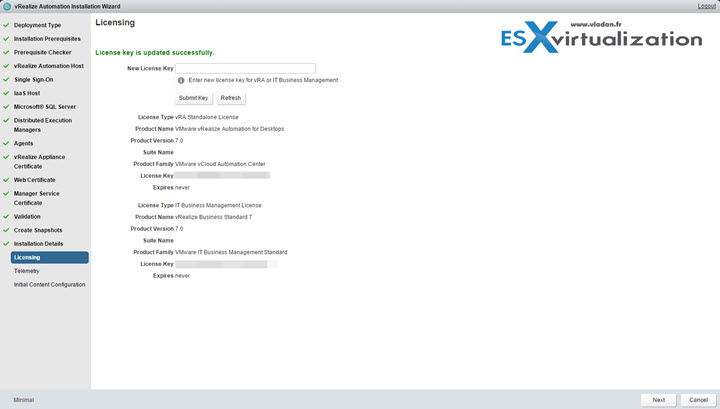
Next step is to enter a license key…
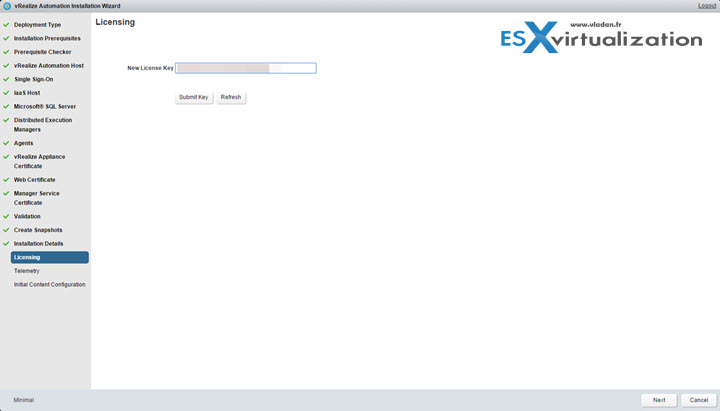
I know it’s a lot of screenshots for single post, but I wanted to have it since the beginning to the end. While there you can enter the license key for vRealize Business 7 as well, and the license gets added to the list.
And we have the
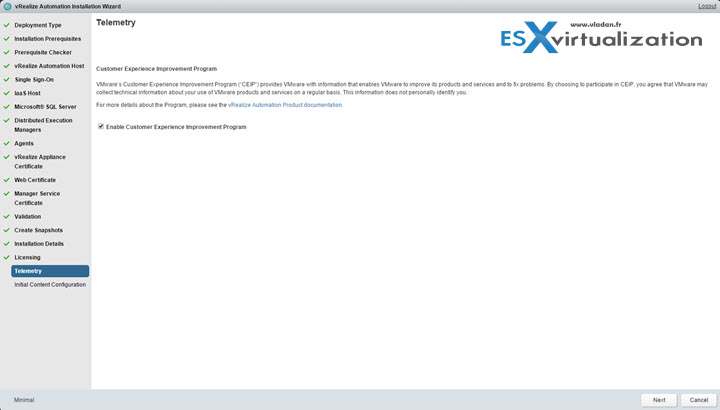
VMware’s Customer Experience Improvement Program (“CEIP”) provides VMware with information that enables VMware to improve its products and services and to fix problems. By choosing to participate in CEIP, you agree that VMware may collect technical information about your use of VMware products and services on a regular basis. This information does not personally identify you.
I don’t mind…
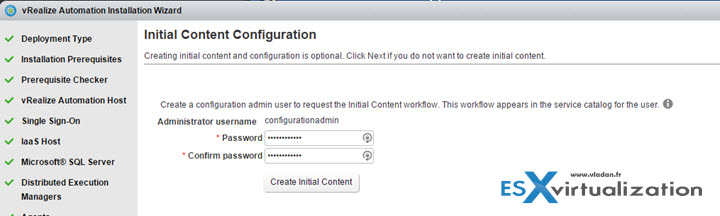
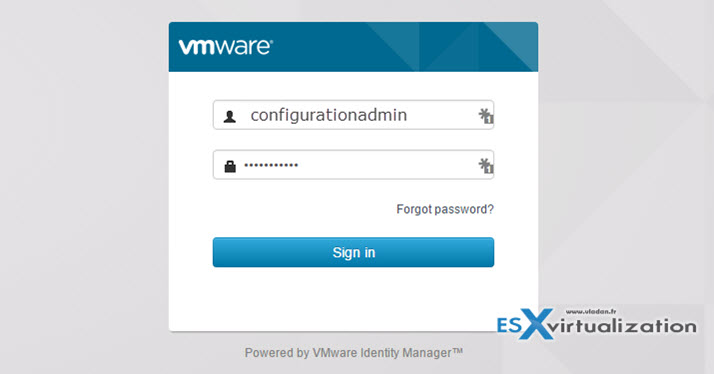
And the last step allows us to setup a password for the user configurationadmin
and will create and generates some content….
This user will be granted infrastructure admin and Tenant admin in the default tenant and vRealize Orchestrator admin in vRealize Orchestrator. The installer will automatically generate a catalog item for the configuration admin user to initiate the initial configuration process from the vRA default tenant.
Click the button Create Initial Content and again, nice progress bar takes few minutes to deploy initial content.
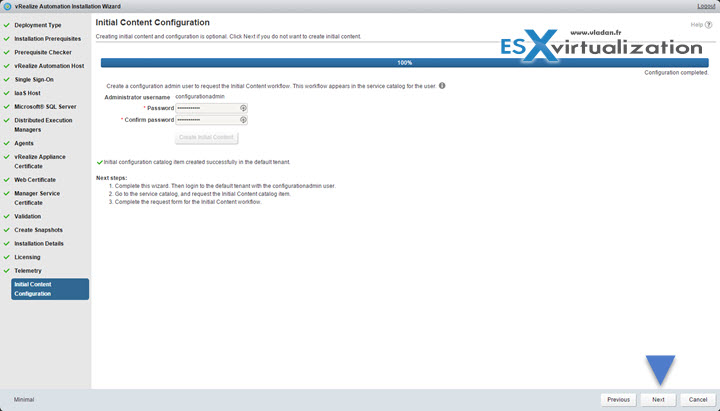
And hitting next button you’ll get the final screen…
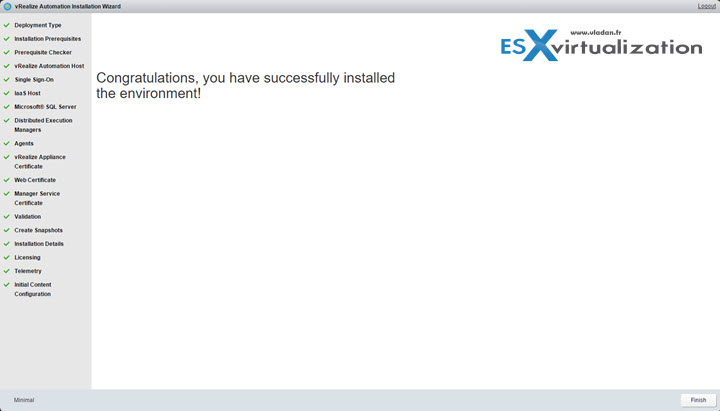
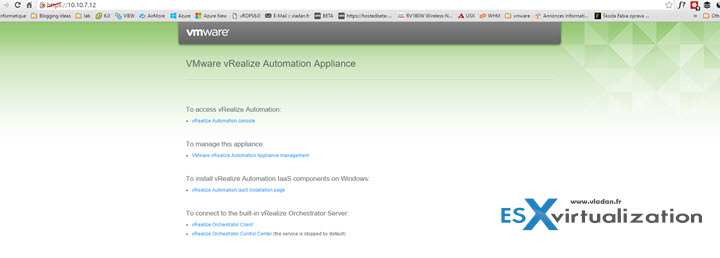
Then hit finish to close the overlay window and go to the main page ( In my case simple to https://10.10.7.12). There you have direct links to sub-components of VRA:
- Main console
- Management console (via 5480)
- To install vRealize Automation IaaS components on Windows
- To vRealize Orchestrator client
- To vRealize Orchestrator control center (stopped by default)
Let’s connect to the main console with
And when clicking the Catalog tab you can see that there is already some content…
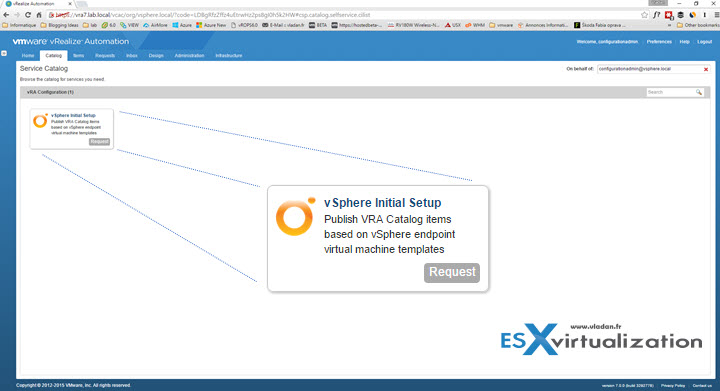
Which allows you to publish VRA Catalog items based on vSphere endpoint virtual machine templates.
Wrap-up
The installation is intuitive. It’s still tedious task and takes a lot of time (and screenshots), but for me everything worked pretty well. Well, the vRA 7 is up and running. Now I can remove the snapshot and create a full backup ….
