اطمینان حاصل کردن از نصب NSX VIBS از طریق هاستهای ESXi
Category : دستهبندی نشده
اطمینان حاصل کردن از نصب NSX VIBS از طریق هاستهای ESXi
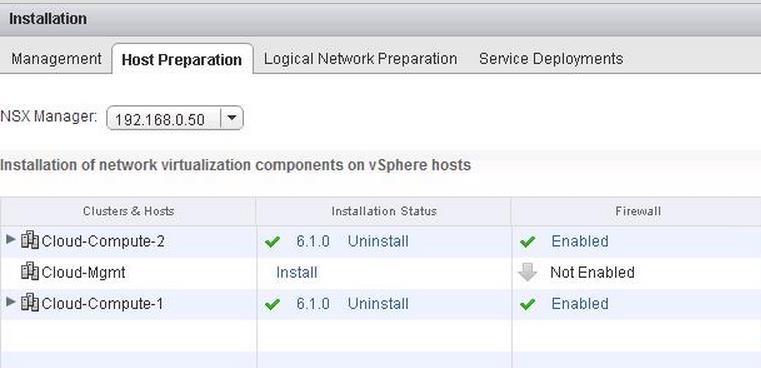
In the previous post, we have discussed about preparing cluster and hosts for NSX. Once the installation is completed, The installation status will change with the Green Check Mark along with the NSX Version of code (6.1.0) running in the cluster along with Enabled Status for Firewall. Let us verify the NSX installation from ESXi host and what are the changes made to esxi host after the Host preparation. Successful host preparation on the cluster will do the following:
- Install network fabric VIBs (host kernel components) on esx hosts in the cluster.
- Configure host messaging channel for communication with NSX manager.Installs User World Agents (UWA).
- Make hosts ready for Distributed Firewall, VXLAN & Distributed Router configuration.
Verify NSX User World Agent (UWA) Status:
The user world agent (UWA) is composed of the netcpad and vsfwd daemons on the ESXi host. UWA Uses SSL to communicate with NSX Controller on the control plane. UWA Mediates between NSX Controller and the hypervisor kernel modules,except the distributed firewall. Communication related to NSX between the NSX Manager instance or the NSX Controller instances and the ESXi host happen through the UWA. UWA Retrieves information from NSX Manager through the message bus
agent.
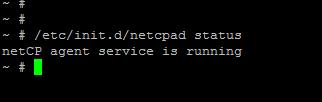
we can verify the status of User World agents (UWA) from CLI:
/etc/init.d/netcpad status
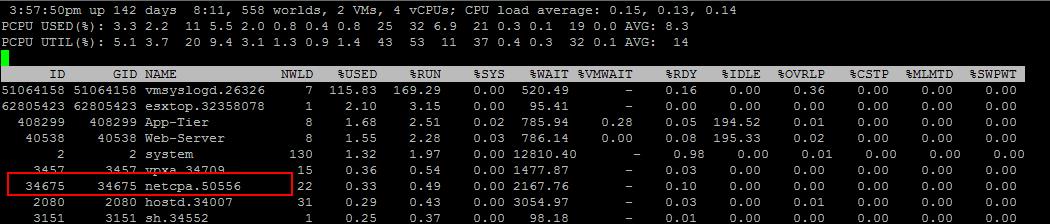
From the ESXtop, You can verify the Deamon called netcpa running:
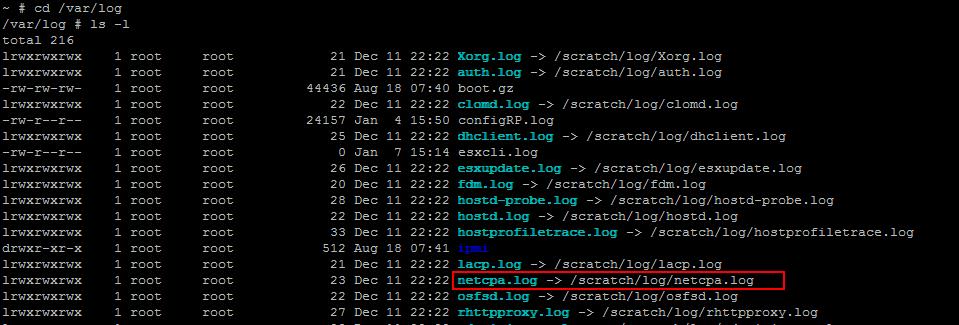
User World Agents (UWA) maintain the logs at /var/log/netcpa.log
Verify Installation Status of NSX VIBs:
Below are the 3 NSX VIBs that get installed on the ESXi host:
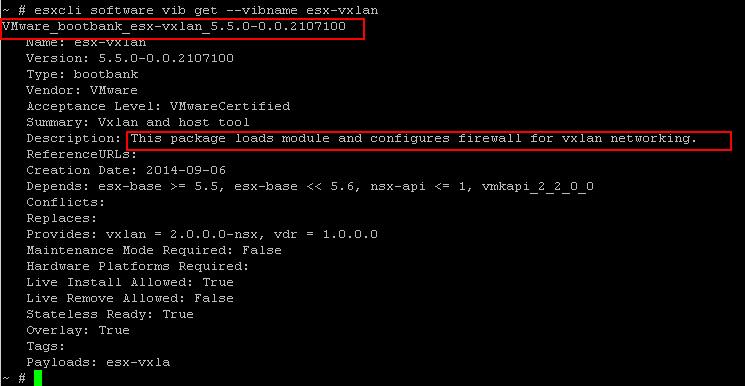
- esx-vxlan
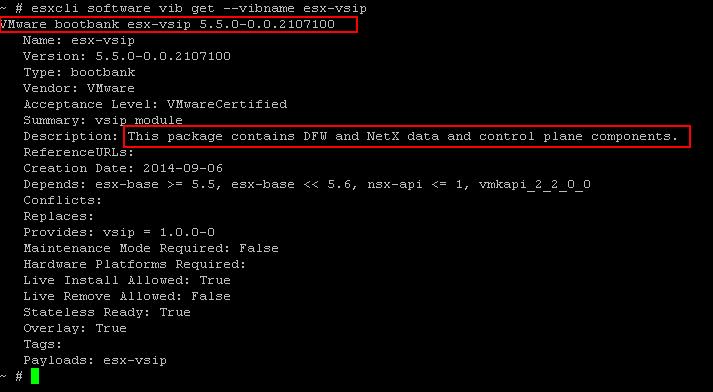
- esx-vsip
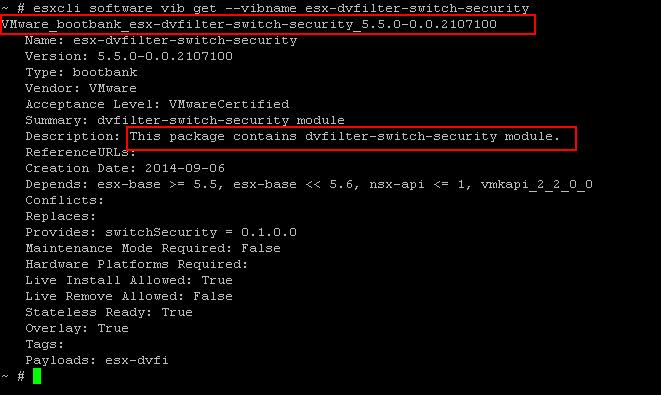
- esx-dvfilter-switch-security
Let’s verify that the all the above VIBs are installed using the below command
esxcli software vib get –vibname esx-vxlan
esxcli software vib get –vibname esx-dvfilter-switch-security
esxcli software vib get –vibname esx-vsip
That’s it. We have verified the status of NSX ViBs installation on ESXi hosts. In the upcoming post, We will take look at configuring VXLAN. I hope this is informative for you. Thanks for reading!!!. Be Social and share it in social media, if feel worth sharing it.
Other VMware NSX Related Posts:
VMware NSX Installation Part 1 – NSX Overview & Installation Prerequistes
VMware NSX Installation Part 2 – NSX Lab Design & Deploying NSX Manager
VMware NSX Installation Part 3 – Integrating NSX Manager with vCenter Server
VMware NSX Installation Part 4 – Deploying NSX Controller
VMware NSX Installation Part 5 – Checking NSX Controller Status
VMware NSX Installation Part 6 – Preparing Cluster and Hosts for NSX
VMware NSX Installation Part 7 – Verify NSX VIBs Installation from ESXi hosts
VMware NSX Installation Part 8 – Configuring VXLAN on the ESXi Hosts
VMware NSX Installation Part 9 -Create Segment ID and Transport Zones
VMware NSX Installation Part 10 – Create NSX Logical Switch
VMware NSX Installation Part 11 – Creating Distributed Logical Router
VMware NSX – Backup & Restore VMware NSX Manager Data
VMware NSX – Unable to Delete/Remove NSX Logical Switch
VMware NSX – How to Manually Install NSX VIBS on ESXi Host
VMware NSX – How to Manually Remove NSX VIBs from ESXi Host?
How to Remove NSX (Network & Security) Extension from vSphere Web Client
