بررسی Site Recovery Manager 6.0 – پیکربندی Protection Group و Recovery Plan
Category : دستهبندی نشده
بررسی Site Recovery Manager 6.0 – پیکربندی Protection Group و Recovery Plan
My previous post in this series looked at creating SRM Inventory mappings and placeholder datastores. With those created, the next step is to create protection groups, and then the recovery plans.
Site Recovery Manager 6 Protection Groups
Put simply, a protection group is a group of virtual machines that can be failed over together. To create a new protection group, go to the ‘Protection Groups’ page in the Site Recovery area of the vSphere Web Client, then click the ‘Create Protection Group’ button:
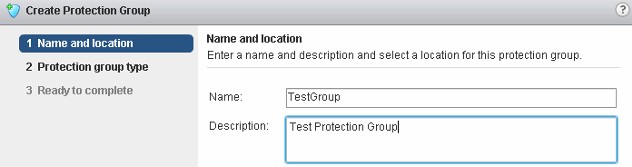
Give the protection group a name and description. On the next page, set the protection group type, which defines which type of replication is to be used, and select the ‘protected site’ for the group:
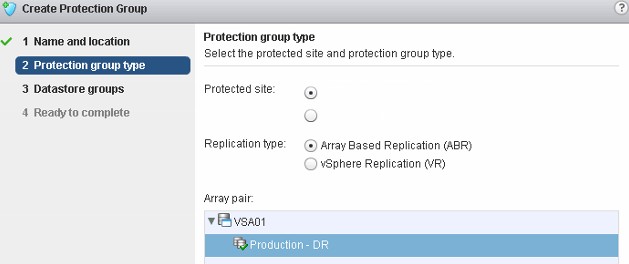
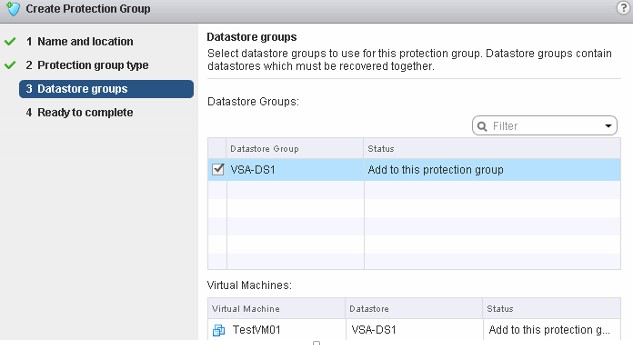
In my lab I am using array based replication, and can see the Array Pair I configured earlier on my HP VSAs. On the next page, select the datastore(s) you want to make part of the protection group. When you do so the VMs placed on those datastores will be listed:
On the final page, review the configuration then click ‘Finish’. You can then review the configuration of the protection group by viewing the objects tab:

This shows the status of the protection group, the type, the current protected site and the replication direction.
Creating Recovery Plans in SRM 6
Now I have at least one protection group, the next step is to create a recovery plan. The recovery plan is what ties everything together and allows for the automated recovery of your virtual machines. To create a recovery plan, head to the ‘Recovery Plans’ plan and click the ‘Create Recovery Plan’ button:
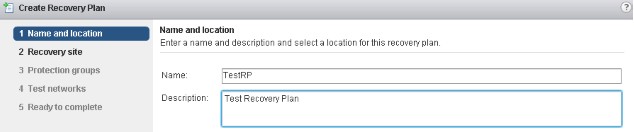
First, enter a name and description for the recovery plan, then on the following page, select the ‘recovery’ site. This is where the virtual machines will be recovered to. On the following page select the Protection Group(s) to include in the new recovery plan:

On the next page, you can configure the test network the RP will use. In my lab I have left it as the default, which is an auto created isolated network in the recovery site:

On the next page, review the configuration before clicking ‘Finish’ to create the recovery plan. You can review (and edit) the recovery plan steps on the plan’s ‘Monitor’ tab:
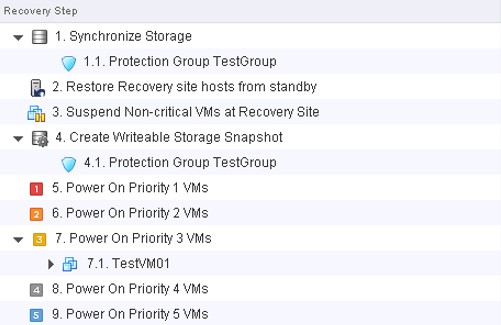
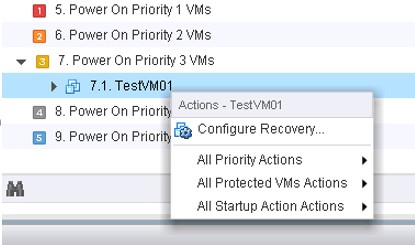
You can fine tune the recovery plan by having SRM run scripts during the recovery and by editing per-VM setting, along with changing the power on priorities of the virtual machines. To edit the settings around how a particular VM is recovered, right click the virtual machine and select ‘Configure Recovery…’:
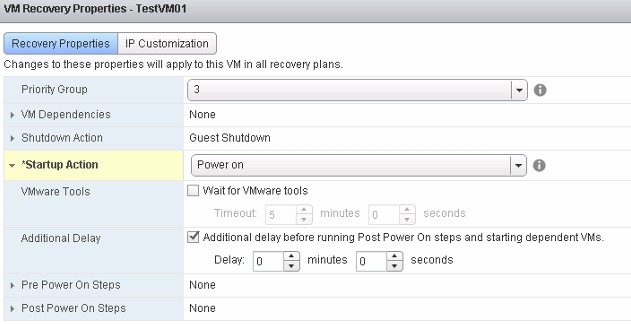
In my test lab, I have some ‘tiny’ linux VMs which do not have VMWare tools installed, so for the recovery of these VMs, I have deselected the option where SRM waits for VMware tools to respond:
That’s about it for creating protection groups, and a basic recovery plan. In my next post on SRM 6 I’ll go through running the recovery plan to recover my production virtual machine at my DR/recovery site.
Keep up to date with new posts on Buildvirtual.net – Follow us on Twitter: Follow @buildvirtual


