نصب و پیکربندی HP StoreVirtual VSA – بخش دوم
Category : دستهبندی نشده
نصب و پیکربندی HP StoreVirtual VSA – بخش دوم
Installing the Centralized Management Console
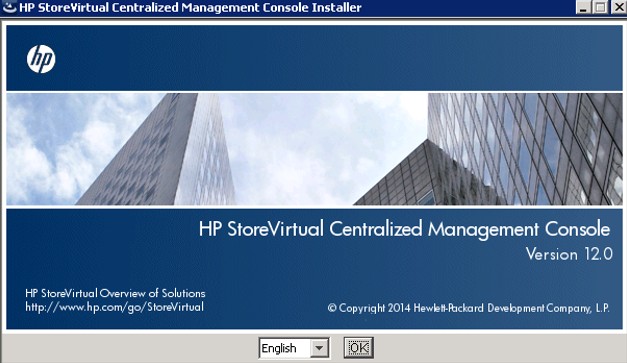
The installation of the Windows based management console is straight forward. After launching the installer you’ll be presented with the install wizard:
The setup screens that follow will be familiar, which pages detailing the license agreement and install location. The only one I wanted to point out is the ‘Choose Install Set’ page, which lets you choose the type of client installation:

In my lab I just chose the Typical installation. Once complete, there should be an icon for the CMC on the desktop and/or start menu. Launch the application to begin configuring the VSAs.
StoreVirtual VSA Management Group Configuration
If the management console is installed on a server that is on the same subnet as the VSA(s) then it will likely have auto-discovered the appliances. In my lab, the console has discovered both of my VSA deployments, named VSA01 and VSA02:

If the VSA hasn’t been discovered you can tell the console how to find it using the ‘Find’ menu item. Once discovered, click the ‘Log in to view’ hyperlink to connect to the VSA and view more information on it:
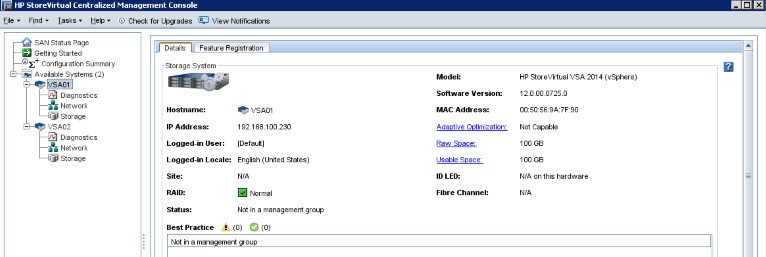
As shown above, I have two VSAs in my lab. They are going to be used as part of an SRM test environment, so I will be pairing them up and configuring replication between them. VSA01 will be considered production storage, whilst VSA02 will be my ‘recovery site’ storage.
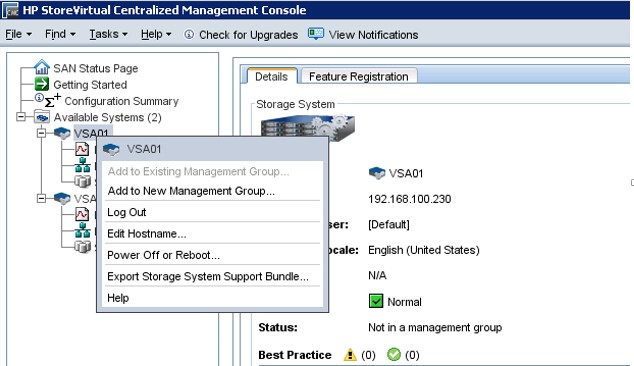
The next step is to create a management group, first for the production site, which will include VSA01. To do so, right click the VSA node and select, ‘Add to new management group’:
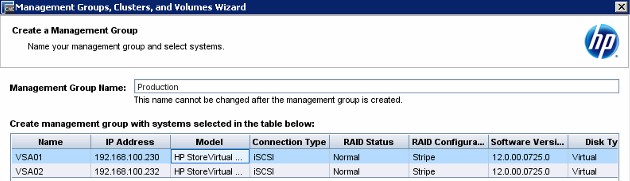
Give the management group a name and select the VSA(s) that will be members of the group:
Next, create a user account:

On the next screens, set the NTP settings, and then the DNS settings:

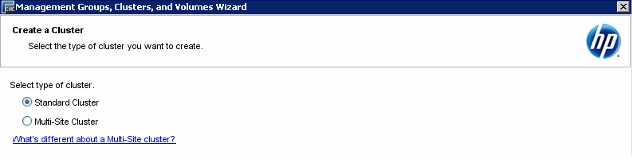
On the next screen, configure SMTP if required for email alerting. Next set the cluster options, – I only have one node in this management group and will be selecting Standard Cluster:
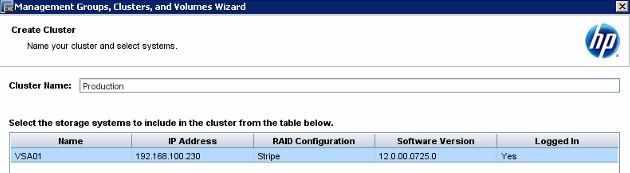
Next, name the Cluster:
Next, create a virtual IP to access the cluster with. We will use this IP later when connecting ESXi hosts to the storage:

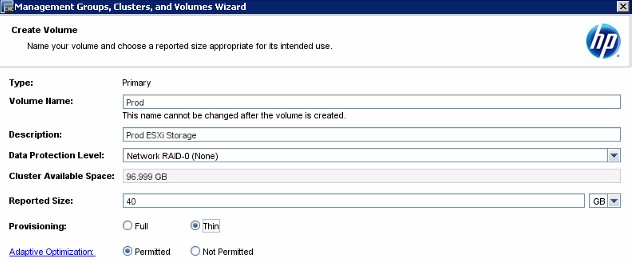
On the next page you are given the opportunity to create a volume, or this can be skipped for now. I have chosen to create a 40 GB volume, which I will eventually present to my ESXi hosts:
Adding Hosts to VSA Management Groups
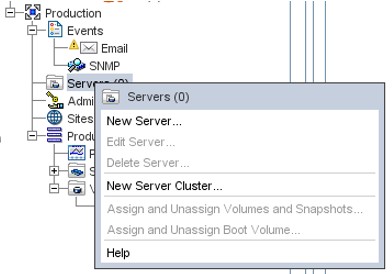
The next step is to give ESXi hosts access to the volume created, to do so, right click on the ‘Servers’ icon, and select ‘New server’:
Then supply the relevant details on the ‘Add Server’ screen:
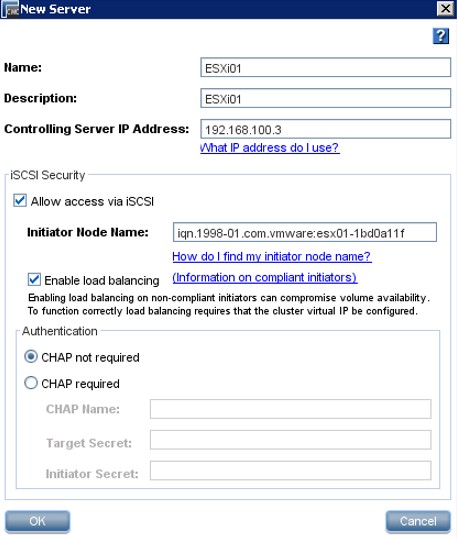
The management IP should be the address of the vCenter server managing the host. In preparation for installing Site Recovery Manager, I added two ESXi hosts to my ‘Production’ management group, and one host to my ‘DR’ management group. Once the hosts have been added here, remember to configure the ESXi hosts to point to the relevant VSA, using the virtual IP address configured earlier. Find out more about configuring iSCSI here. The next step is to present storage from the VSA to the hosts.
Presenting Storage
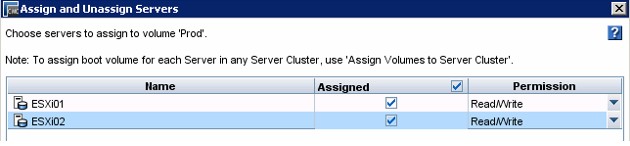
Now we have created a volume, and defined our hosts, we can present the storage to the hosts. To do so, right click on the volume, and select ‘Assign and Unassign Servers’:

On the next screen, choose the hosts to present the storage to:
After clicking OK, rescan the hosts iSCSI adapter to see the presented volume:
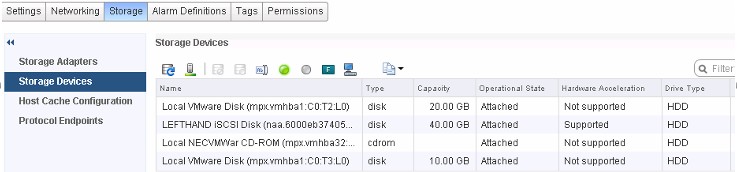
As you can see from the screen shot above, after performing a storage rescan on my host, I can see the 40GB volume presented from the VSA.
Configuring Replication
The last step I’m going to do here is to configure replication so that my 40GB production volume is replicated to my ‘DR’ VSA. To set up replication for a volume, right click on the volume and select ‘New Schedule to Remote Snapshot a Volume’:
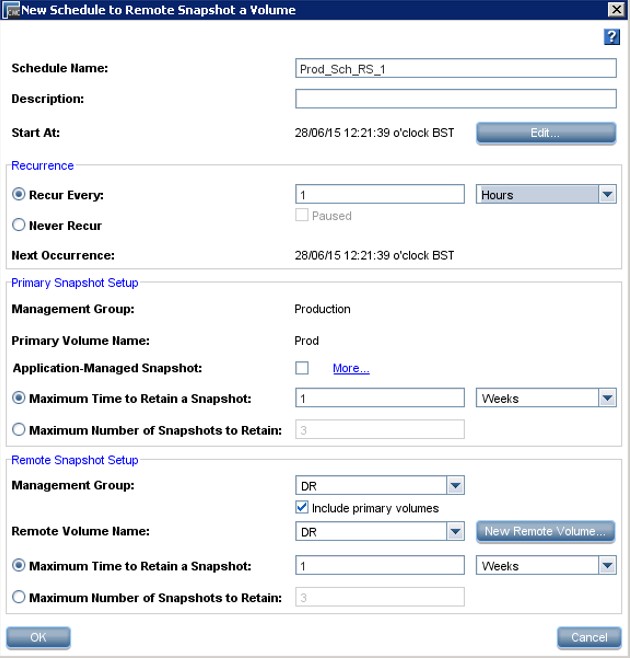
As you can see above, the replication setup is fairly straight forward. The replication schedule needs to be named, then there are the schedule and recurrence options, followed by choosing the source/primary volume (Prod) and then the remote snapshot (DR). There’s the option to create the new remote volume at this point.
And that’s it for this post. There’s a lot more to talk about on the VSA, but at this point in my lab environment I have a working solution, with storage presented to ESXi hosts and being replicated to another VSA, representing a DR site. My next post will look at installing and configuring Site Recovery Manager 6, to make use of the VSA storage setup, and provide for automated failover.
نصب و پیکربندی HP StoreVirtual VSA – بخش اول
