نصب vCenter Operations Manager
نصب vCenter Operations Manager
در این مطلب می خواهیم به مراحل نصب vCenter Operation Manager vCops بپردازیم. این مقاله بر مبنای راه اندازی vApp که آسانترین متد می باشد تنظیم شده است.
این مقاله کلیات نصب نرم افزار vCops 5.7.2 بر روی ورژن 5.5 نرم افزار vSphere و vCenter را توضیح داده است. کل چیزهایی که برای نصب و راه اندازی VCOPS نیاز داریم ساختار ESXi به همراه یک سرور vCenter و برنامه vSphere Web Client که باید بر روی سیستم نصب گردد. برای vSphere Web Client شما باید همچنین پلاگین Client Integration آن را نیز نصب بکنید بدلیل اینکه بدون این نرم افزار شما نمی توانید هیچ Appliance را Export یا Import نمایید و یا حتی قابلیت دانلود و یا آپلود کردن فایلها از سیستم Local برای شما وجود نخواهد داشت.
لینک نصب پلاگین در پایین صفحه لاگین vSphere Web Client در دسترس می باشد. شما از لینک زیر می توانید نرم افزار vCenter Operation Manager را نیز دانلود نمایید.
(www.vmware.com/go/download-vcops)
داشتن DNS برای دامینی که شما قصد نصب vCops VApp بر روی آن را دارید بسیار پیشنهاد می شود.
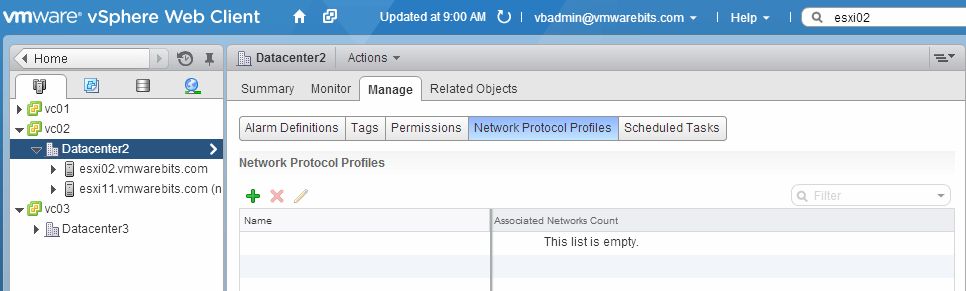
در vSphere Web Client به Datacenter جایی که vCops-vApp اجرا خواهد شد می رویم و سپس به تب Manage رفته و بر روی Network Protocol Profiles انتخاب می کنیم. بر روی دکمه بعلاوه کلیک کرده و یک پروفایل جدید ایجاد می کنیم.
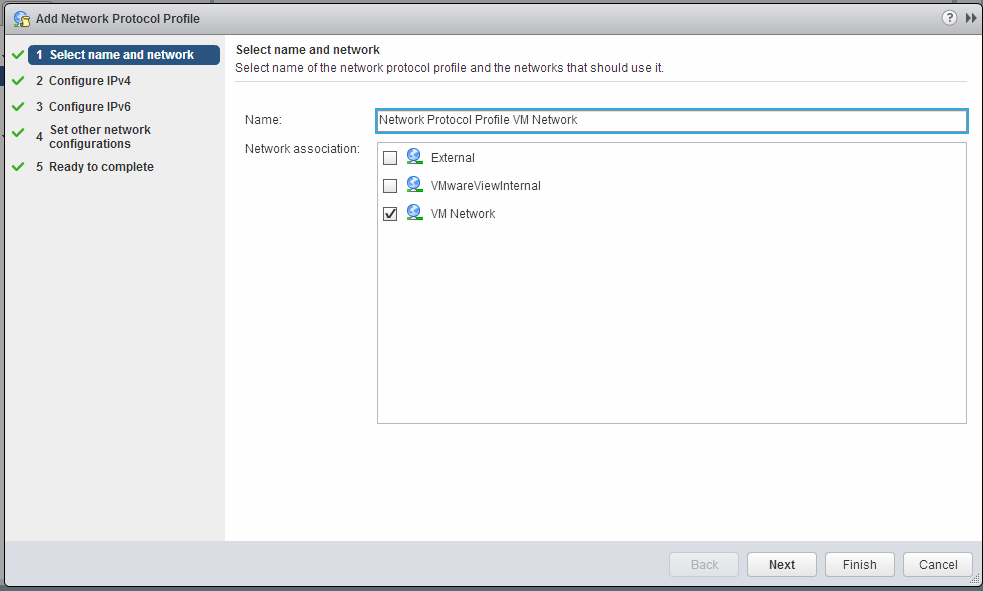
برای پروفایل خود یک نام انتخاب نمایید و از لیست جایی که vApp پیوست خواهد شد بر روی Virtual Machine Port Group انتخاب می کنیم.
در اینجا پیش فرض VM Network می باشد.
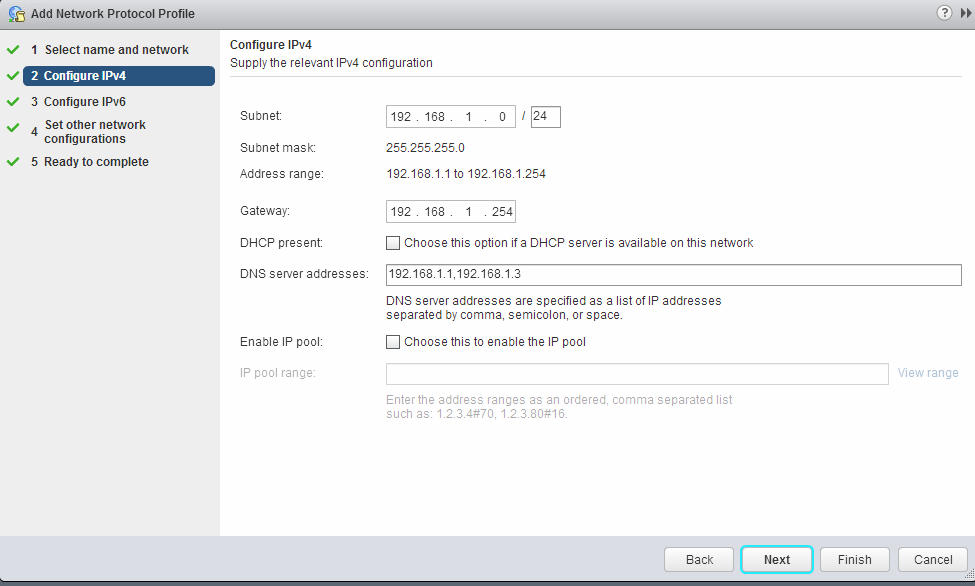
در مرحله بعدی نحوه آدرس دهی IP ها در پروفایل مشخص می گردد. پایه ای ترین تنظیمات مربوط بهIP Subnet و Default Gateway و سرور DNS می باشند. شما نیازی به فعال کردن Pool ندارید بدلیل اینکه از Pool برای ارائه آدرس ها به شبکه استفاده نخواهد شد. شما باید در راه اندازی vApp از آدرس IP های ثابت استفاده کنید. تنظیماتی مانند Gateway و DNS بسیار ضروری می باشند بخاطر اینکه این تنظیمات به ماشین های مجازی vCops تزریق خواهند شد و بدون این تنظیمات ماشین های مجازی فاقد Default Gateway و DNS-Server خواهند بود و با مشکلات عدیده ای برخورد خواهیم کرد.
شما می توانید در این مرحله از کانفیگ کردن IPv6 صرف نظر کنید.
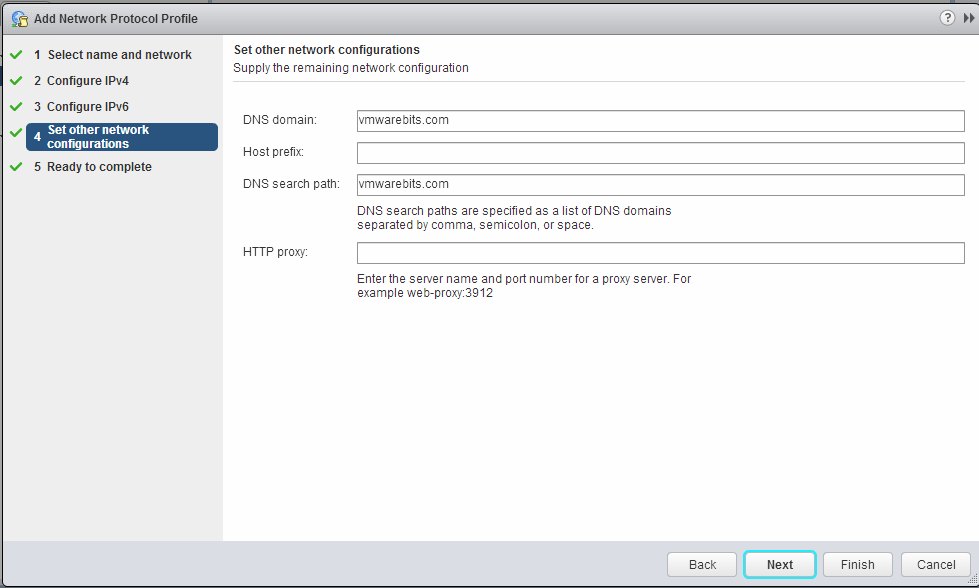
در این مرحله DNS Domain و DNS Serach path برای vApp تنظیم می کنیم.
تنظیمات را برای پروفایل بررسی و بر روی دکمه Finish کلیک کرده تا پروفایل ایجاد گردد.
 It is not absolutely necessary to create the Network Profile manually because when it doesn’t exist the deployment wizard will create one. But when you have manually created the profile then you also know where the vCops vApp depends upon so it is less likely that a misconfiguration might occur. For example if you move the virtual machines in the vApp to another network without a profile you would receive an error. Because you have created it manually you now know why.
Now it is time to import the vCops vApp. Right click the Datacenter-object or select Actions from the top-bar and select Deploy OVF Template. Browse to the downloaded vCops vApp OVA-file. The deployment wizard will show an overview of the vApp and wil report how much disk space the virtual machines will require depending on a thin- or thick-provisioned disk. Keep this in mind when choosing the disk-provisioning type later on in the wizard.
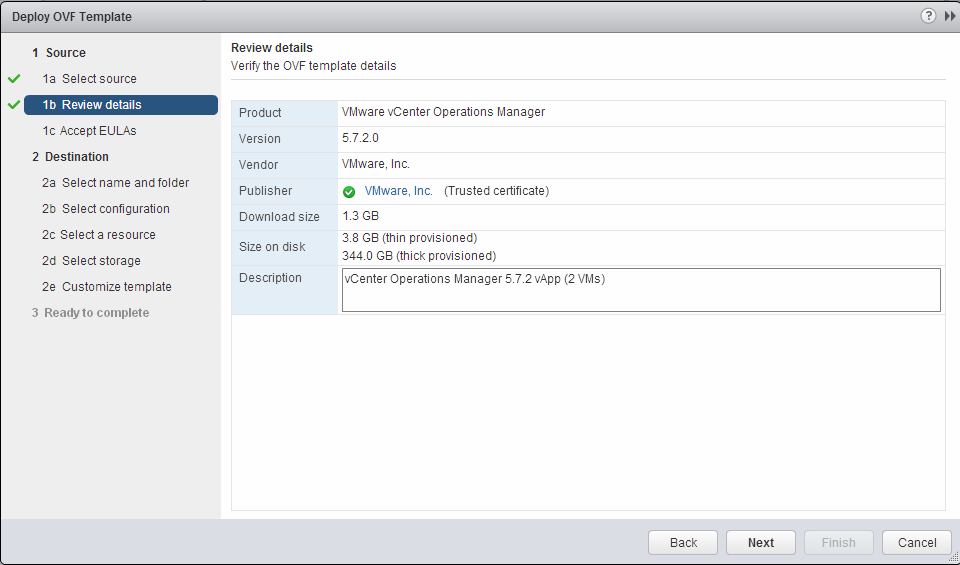
The next steps are:
- Accept the license agreement
- Provide a name and location for the vApp
- The expected size of your environment (Small, which is less than 1500 VMs, or Medium, up to 3000 VMs or Large, more than 3000 VMs.)
- The server and datastore where to store the vApp, also don’t forget to choose thin- or thick-provisioning for your disks.
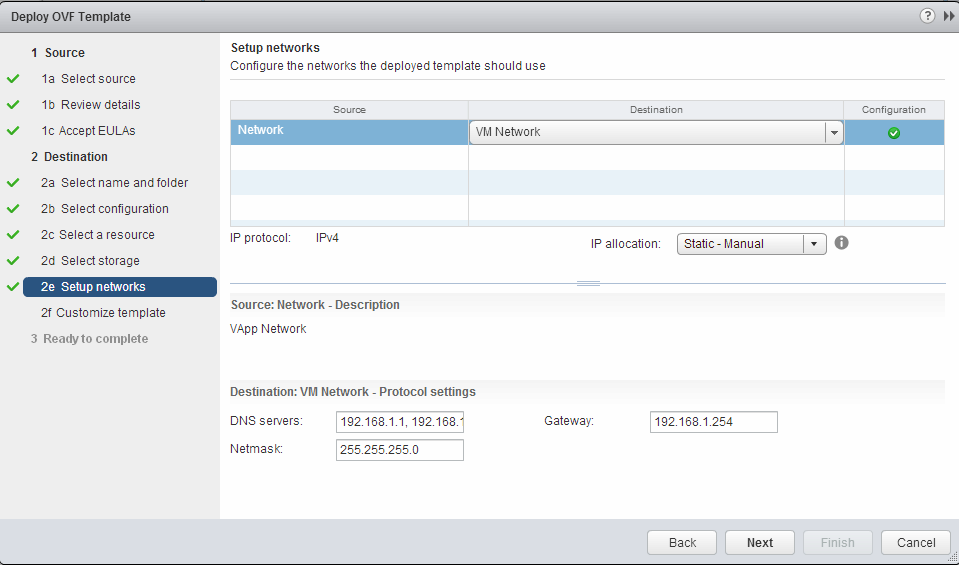
Next configure the network to attach the vApp to and set the configuration to use static IP-addressing in stead of DHCP. This is where the information from the earlier created Network Profile is collected.
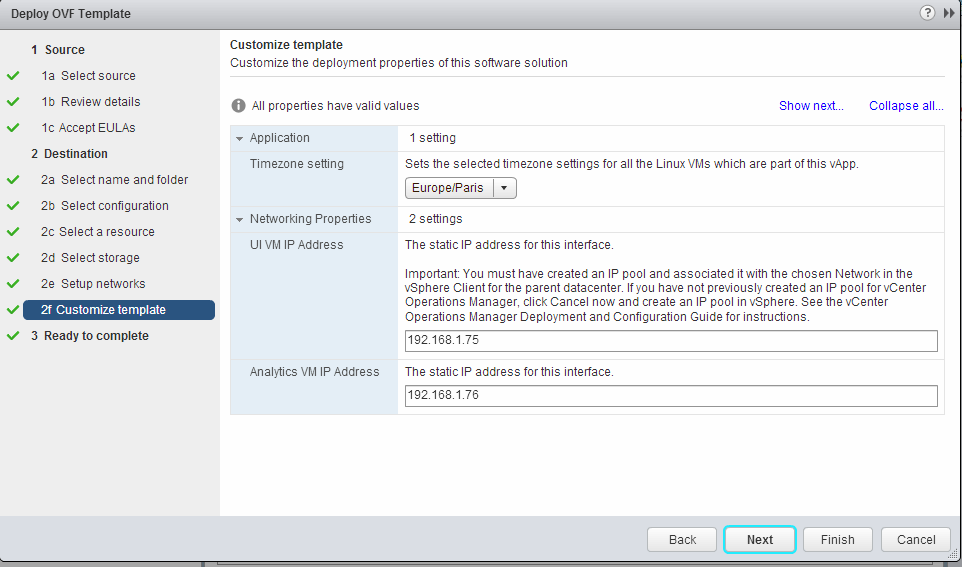
The last step is to configure the time zone for the vApp and the IP addresses for the two VMs
At the last page of the deployment wizard review the information and select to Power on the vApp after deployment. Creating the vApp and powering on the VMs to a full working state will take a while, five to ten minutes at least.
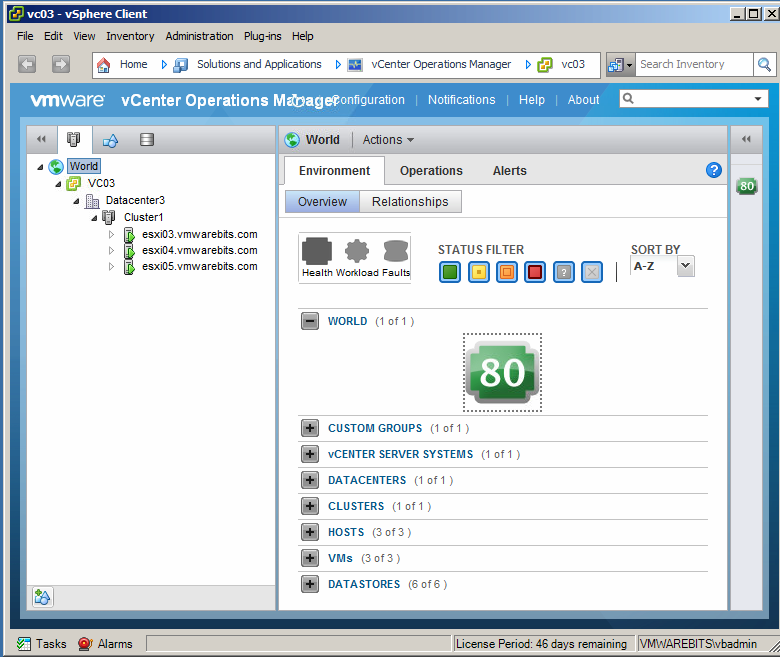
In the image below you can see the powered on vApp in the Datacenter.
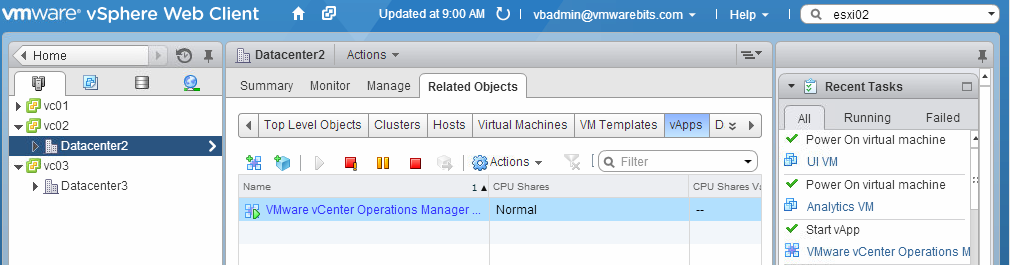
If you open the vApp it will show the two virtual machines that run vCops: the UI-VM and the Analytics-VM.
To further configure vCops open a new web browser page to the IP-address of the newly configured UI-VM to access the administrative portal. In this example it is https://192.168.1.75/admin. Login as the admin user.
Default user for vCops: admin
Default password: admin
(Default password for VM local user root = vmware)
At the first login you will be prompted to provide details for the vCenter server that is used to host the vCops-vApp and the connection to the Analytics-VM, this last one should be filled in with the correct address already. The connection to the vCenter server might come up with a message to accept the server’s certificate, which you should do if you can verify that it’s the correct server responding.
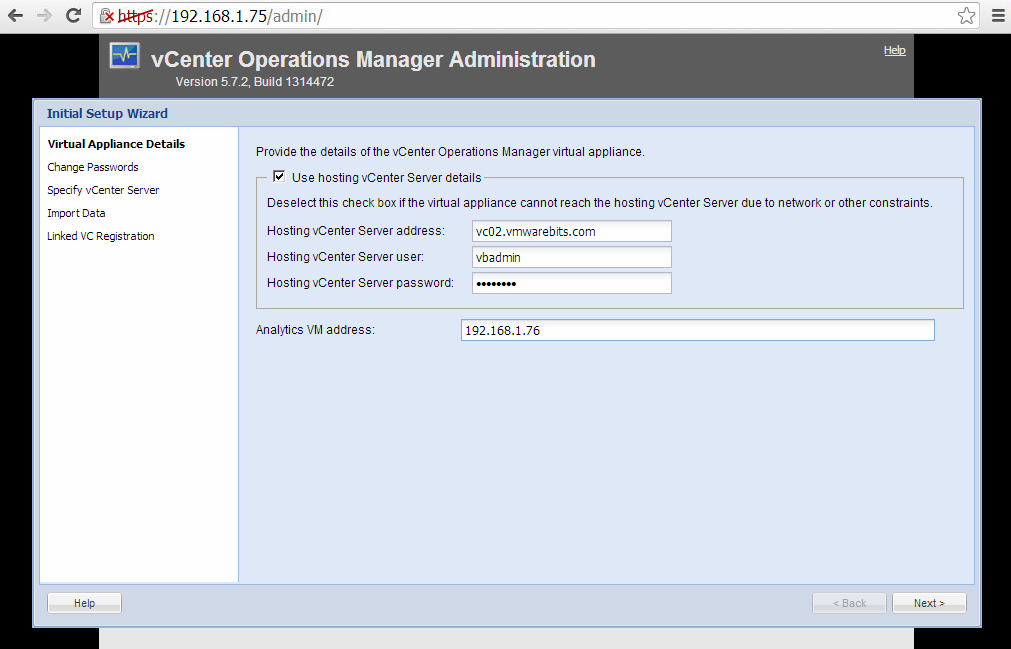
Next you must provide a new password for the admin-user and also for the root user that you can use to login to the individual Linux-VMs of the vApp. The default password for user root is vmware.
Next provide details for at least one vcenter server that you want to monitor.
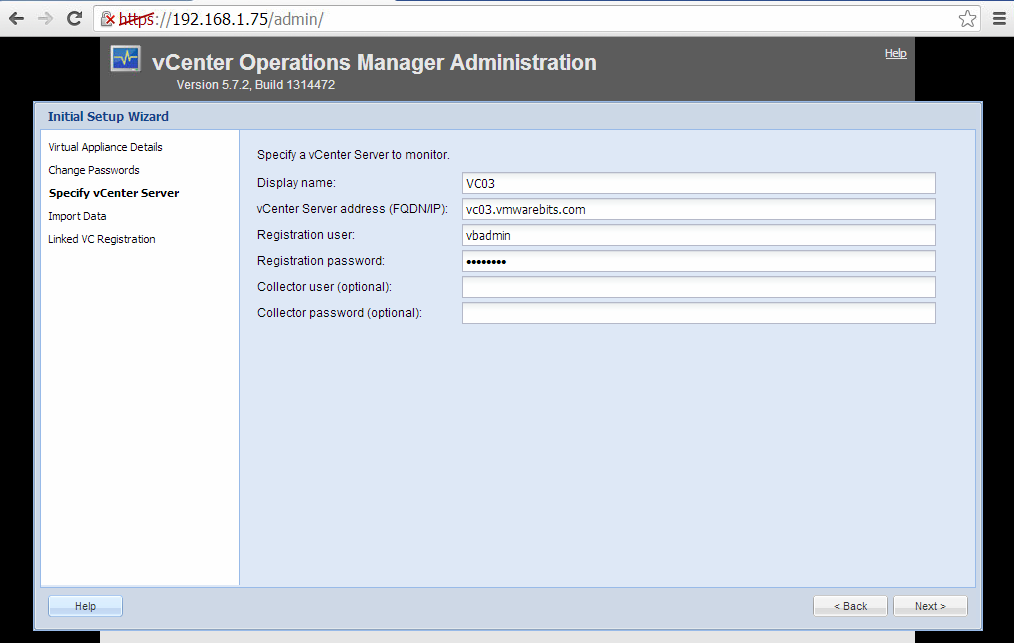
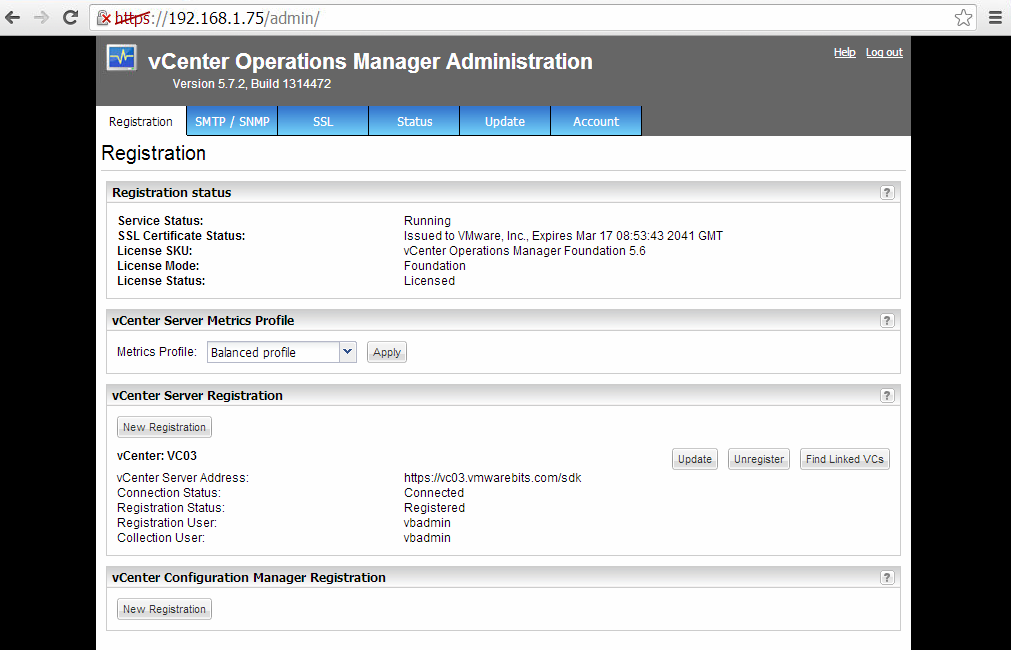
If there are vCenter plugins or linked vCenter they will be listed and configured in the next screens, if not you can skip that and go to the last screen, click Finish and let the vApp configure itself and connect itself to vCenter. When it is done you can verify that it is running and also that it is licensed in the Foundation-mode, which is default if you did not purchase a vCops-standard, advacned or enterprise license. On the Registration-tab you can also add additional vCenter servers to monitor.
Next steps to configure now that you are in the administrative portal anyhow are SMTP- and SNMP-servers to send emails or traps to.
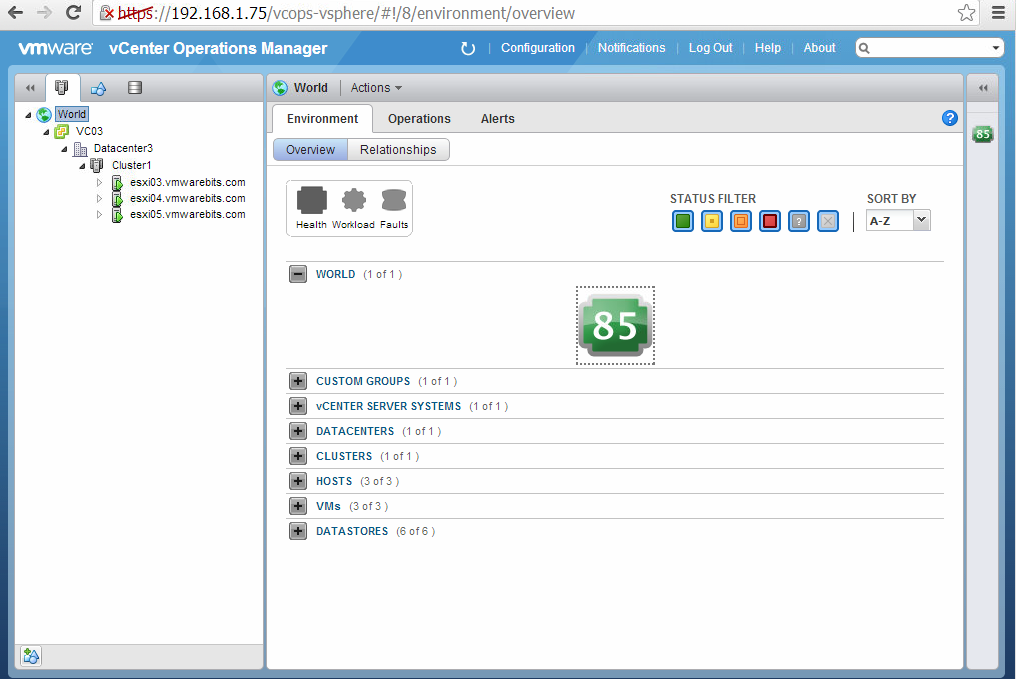
If you are done access your new vCops installation through a browser, in this example the URL ishttps://192.168.1.75/vcops-vsphere
vCops can also be accessed from the vSphere client if you are still using that, and it by the way is to only method of providing other users the embedded admin user to access the vCops environment. Creating multiple users is only possible in the custom-UI interface that comes with the advanced and enterprise editions of vCops.
In the vSphere client find the the vCenter Operations Manager icon on the Home-page of the client.
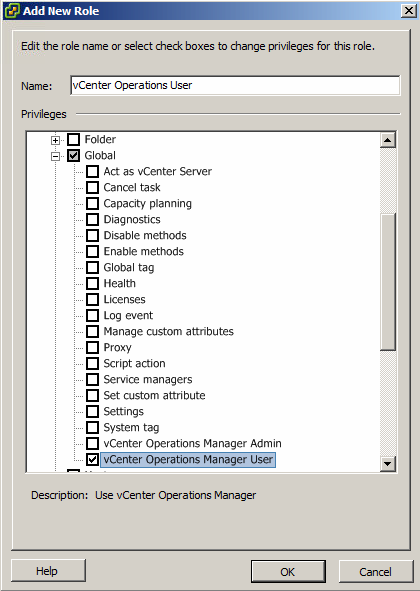
To assign access privileges for other users than administrator go the the Roles configuration of the vSphere Client and add the vCenter Operations Manager user- or admin-privilege to an existing role or create a new role. When creating a new role don’t forget to assign a new permission in the vCenter-inventory. The user will be able to report with vCops on those objects that he or she also has access rights to in the inventory.

آخرین دیدگاهها